Pages

Thursday, May 20, 2021

Nuggle Mini Bundt Cakes #BundtBakers


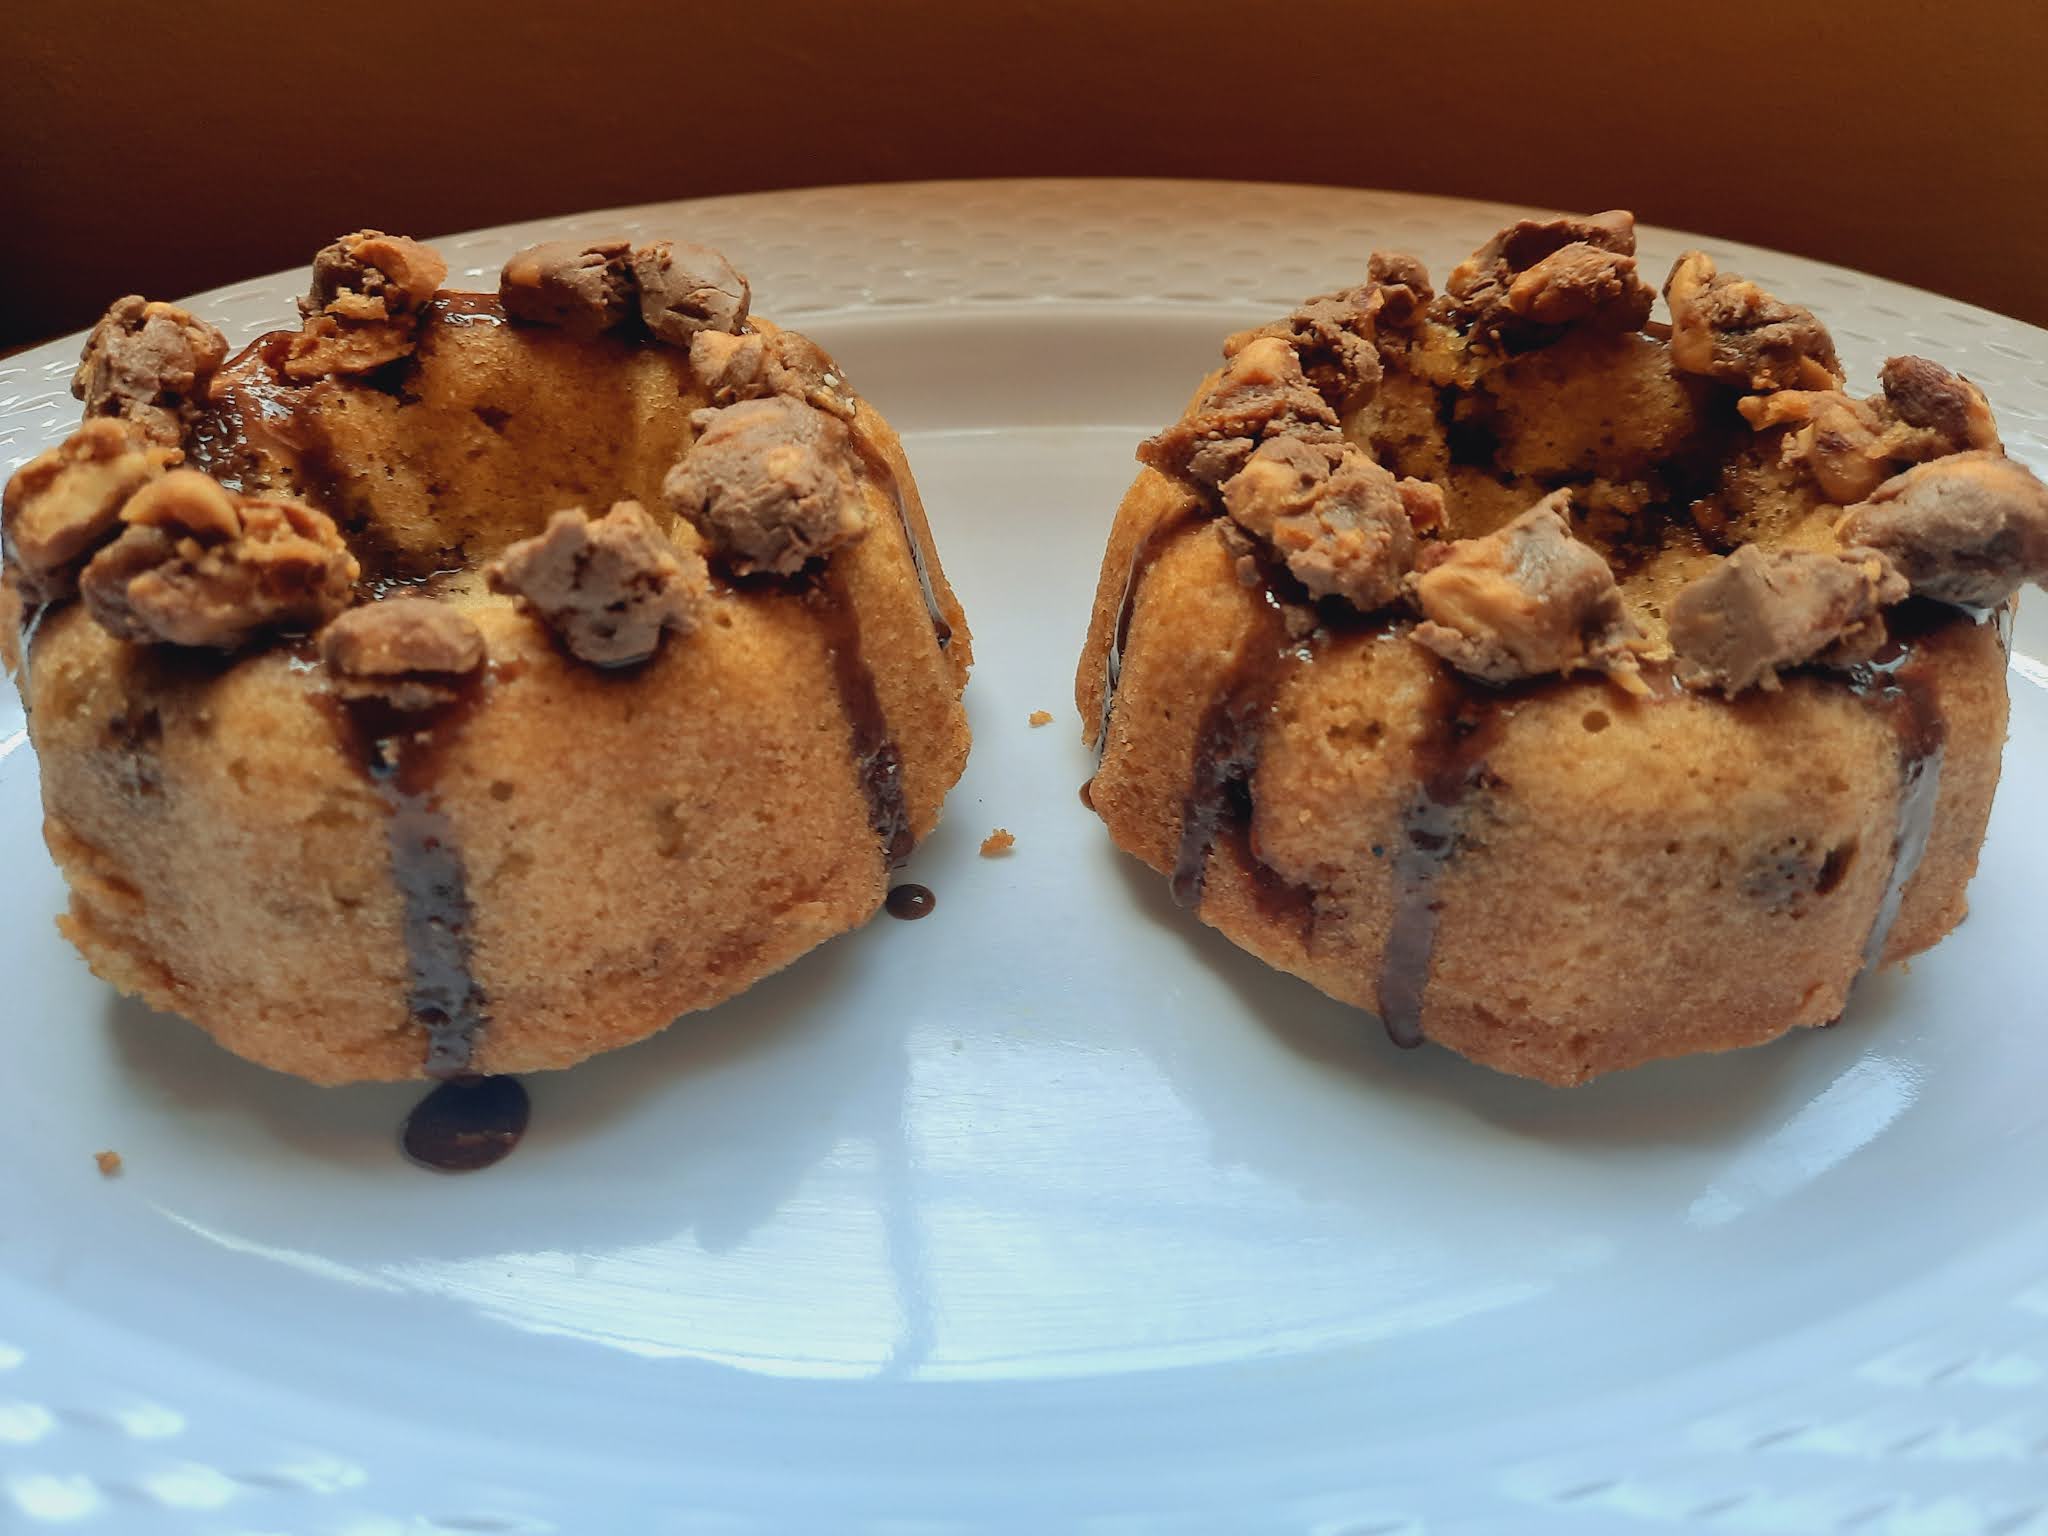
These mini Bundts are filled with chopped bits of a chocolate bar called Nuggle. Nuggle is made in Trinidad by Charles Chocolates. They describe them as having lots of peanuts, chewy fudge, creamy caramel in milk chocolate. And when you pull one out of the package, that's exactly what it looks like - a pile of peanuts covered in chocolate. 


Because of all the nuts, it has 7 g of protein and my mother treats it like a protein bar. She buys one or two each time she is out running errands. When she is doing her monthly shopping, she buys a few bars to save for when she's heading out again. And then she eats them all at once. Suffice to say, she loves Nuggle. 


This month, Bundt Bakers are putting their mother's favourite chocolate bars into Bundt cakes. I grabbed a Nuggle, scroll down to see what chocolate bars the other Bundt Bakers grabbed. 


Nuggle Mini Bundt Cakes
Yield: 4 mini Bundt cakes

Ingredients 

Cake 
3/4 cup (90g) flour 
1/2 teaspoon baking powder
1/4 teaspoon salt
1/4 cup butter, room temperature
1/2 cup sugar 
1 egg
1/4 teaspoon vanilla 
1/4 cup milk
1 54g Nuggle bar finely chopped

Topping 
Chocolate sauce 
1/2 54g Nuggle bar 


Directions 

Thoroughly grease and flour four 1 cup capacity mini Bundt pans. Preheat oven to 350 F. 

Whisk flour, baking powder, and salt and set aside. Cream butter and sugar until fluffy. Add the egg and beat well. Scrape the sides of the bowl if necessary then beat in the vanilla. 

Add the flour mixture in three parts alternating with the milk, starting and ending with flour. 

Mix until well-combined. Next, gently fold in the chopped Nuggle You might be tempted to add more Nuggle pieces. However, too many pieces might cause your mini cakes to stick. 

Divide among the four pans. 

Bake 15 minutes or until a toothpick inserted into a cake comes out clean. 

Cool until the little cakes are still a bit warm then carefully remove from the pan. 

Top with just enough chocolate sauce to let the Nuggle pieces stick to the top. Sprinkle with chopped Nuggle. 

Enjoy!


BundtBakers


#BundtBakers is a group of Bundt loving bakers who get together once a month to bake Bundts with a common ingredient or theme. You can see all of our lovely Bundts by following our Pinterest board. We take turns hosting each month and choosing the theme/ingredient.
Updated links for all of our past events and more information about BundtBakers, can be found on our home page.


post signature


Tuesday, May 11, 2021

Paw Print Bread #BreadBakers


Some years ago, I saw pictures of a Panda Bread and an Owl floating around the internet. It was during the time that I baked bread multiple times a week so I jumped at the chance to try. I opted for the owl. I loved the turnout even though my owl looked a bit drunk. However, I never tried anymore because I remember that kneading the different colours into the dough was tedious. Fast forward to some months ago when I wanted to do a Surprise Inside cake. I nixed that idea when I realised how much cake would be wasted. But maybe I could try surprise inside bread instead? I proposed that theme to Bread Bakers. 

I am excited that so many opted to join in on creating these loaves this month. I had planned one design and then realised that I just didn't have those skills YET. Back to the drawing board. I used play dough to plan a flower inside a loaf. It worked in play dough but when I cut into my loaf, it was just random swirls. 

I decided to move onto the paw print. It wasn't easy. While I have a lot of in progress pictures of my failed flower, I don't have many of this paw. I was too busy trying to balance the four pieces of dough on top. If I did this again, I think I would go for 3 toes instead of 4. The paw pad got a bit messed up but each person I showed, immediately recognized that it was a paw. Happiness.

Not a looker. But cut him for a surprise.


Thanks to the Bread Bakers for joining me this month. Scroll down to see all their surprises and learn about our group. 

Paw Print Bread

Ingredients

400 grams flour
2 teaspoons instant yeast
3 tablespoons sugar
1 teaspoon salt
1 egg
3 tablespoons oil
220 ml milk
Food colouring

Directions

Whisk flour, yeast, sugar, and salt. Add the egg, oil, and milk. Knead all the ingredients to form a shaggy dough - no more than 2 minutes. You just want the dough to just start coming together. 

Divide the dough into 2 pieces. One piece should be three times the weight of the other. Use your scale for this. Weigh the dough. Divide the weight by 4. Remove that amount of the dough and place in a separate container. 

Example. If your total dough weighs 720 grams. The smaller portion should weigh 720/4 = 180 g. 

Knead the larger portion until it forms a soft, slightly tacky dough. 

Add food colouring of your choice to the second piece and knead until the colour is evenly distributed. This takes a few minutes. I used about 10 drops or so of red food colouring to achieve this colour. 

Cover both pieces of dough and leave to bulk ferment at room temperature until doubled. You can also refrigerate overnight. That is my preferred method. 


When the dough has doubled, the fun begins. 

Grease a loaf pan. I used a 9" x 5" pan but I think an 8" x 4" might make handling the toes easier. Or just doing three toes. I will experiment. 


Divide the coloured dough into two equal pieces. 
Divide one portion into  equal pieces. These will be the toes. The larger dough will be the paw pad. 

Divide the white dough into two pieces. One piece should be slightly larger. Now, divide the larger portion into 4 equal pieces. The large portion will surround the paw pad and the smaller pieces will surround the toes. 

Take the large coloured dough and stretch and roll it into a rectangle that's about 8" x 3". This is a rough measurement. Roll into a tight log. 

Take the large white dough and stretch and roll into a rectangle about 8" x 3". Place the coloured log on this white rectangle and roll it up really tight. 

Place seam side down in a greased loaf pan. 


Take a small coloured ball and stretch and roll it into an 8 inch by 1 inch rectangle. Roll this into a tight log. I guess you could roll it into a log as the beginning but I worry that this is what went wrong with my flower. 

Take a small white ball and stretch and roll it into a. 8 inch by 3 inch rectangle. Place the coloured log on this rectangle and roll it up really tight. 

Repeat with the other three coloured toes and their white "covers". 

Place the toes on top of the pad. It could get a bit top heavy. Just hope for the best. 

Allow to proof at room temperature until the dough is puffy. Before the dough is ready, preheat oven to 350 F. 

Bake the risen dough for 30-35 minutes. 

Remove from oven. Cool, slice and marvel at your amazing work. 


BreadBakers
 #BreadBakers is a group of bread loving bakers who get together once a month to bake bread with a common ingredient or theme. Follow our Pinterest board right here. Links are also updated each month on this home page.

We take turns hosting each month and choosing the theme/ingredient.